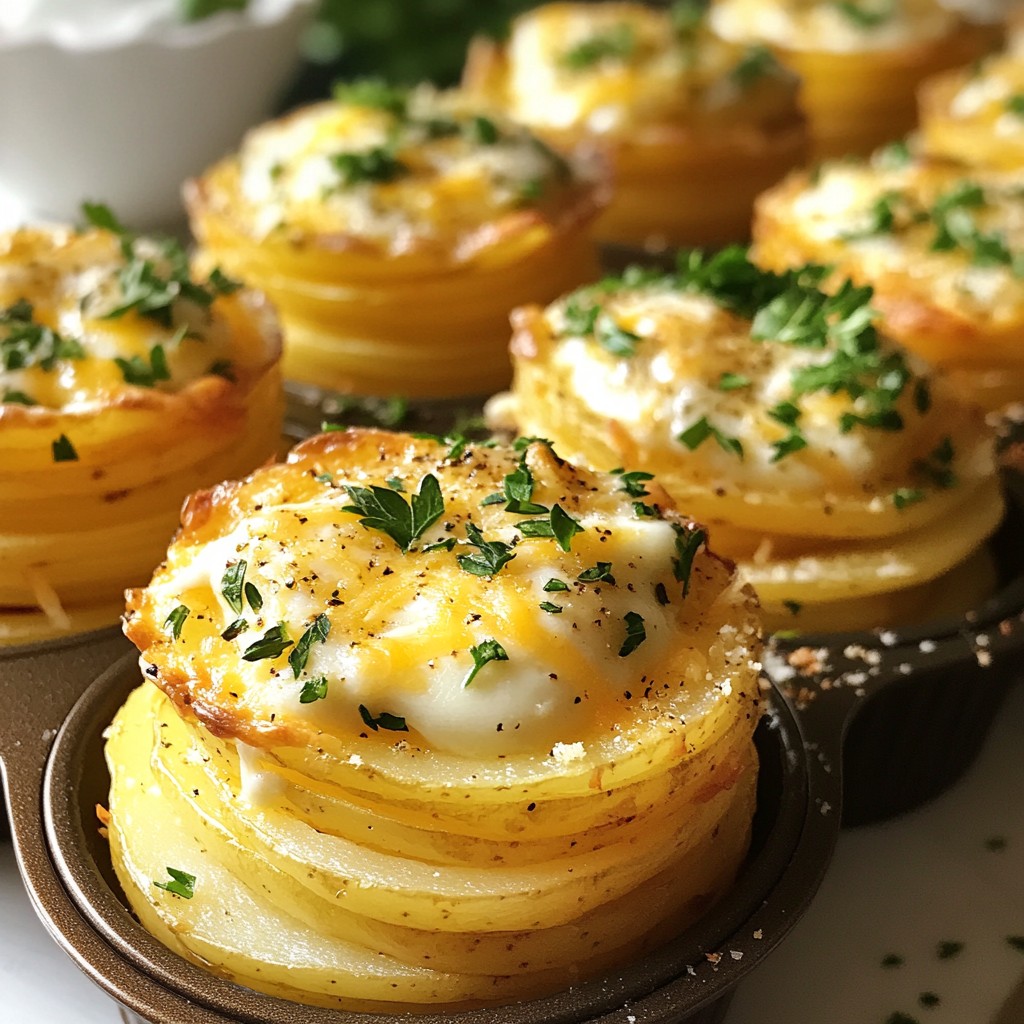
If you're craving a side dish that packs flavor and comfort, look no further! My Cheesy Garlic Butter Potato Stacks are not only mouthwatering but also simple to make. Layer crispy potato slices with rich garlic butter and gooey cheese for a dish that’s perfect alongside any meal. Join me as we dive into the ingredients, tools, and tips to create this crowd-pleaser that will have everyone coming back for seconds!
Why I Love This Recipe
- Easy to Prepare: This recipe requires minimal prep and cooking skills, making it perfect for both novice and experienced cooks.
- Flavorful Layers: The combination of garlic, herbs, and cheese creates a mouthwatering flavor profile that will impress your guests.
- Perfectly Portion-Controlled: Baking the potato stacks in a muffin tin gives you individual servings that are easy to serve and enjoy.
- Great for Any Occasion: Whether it's a family dinner or a festive gathering, these cheesy garlic butter potato stacks are a crowd-pleaser!
Ingredients
List of Ingredients
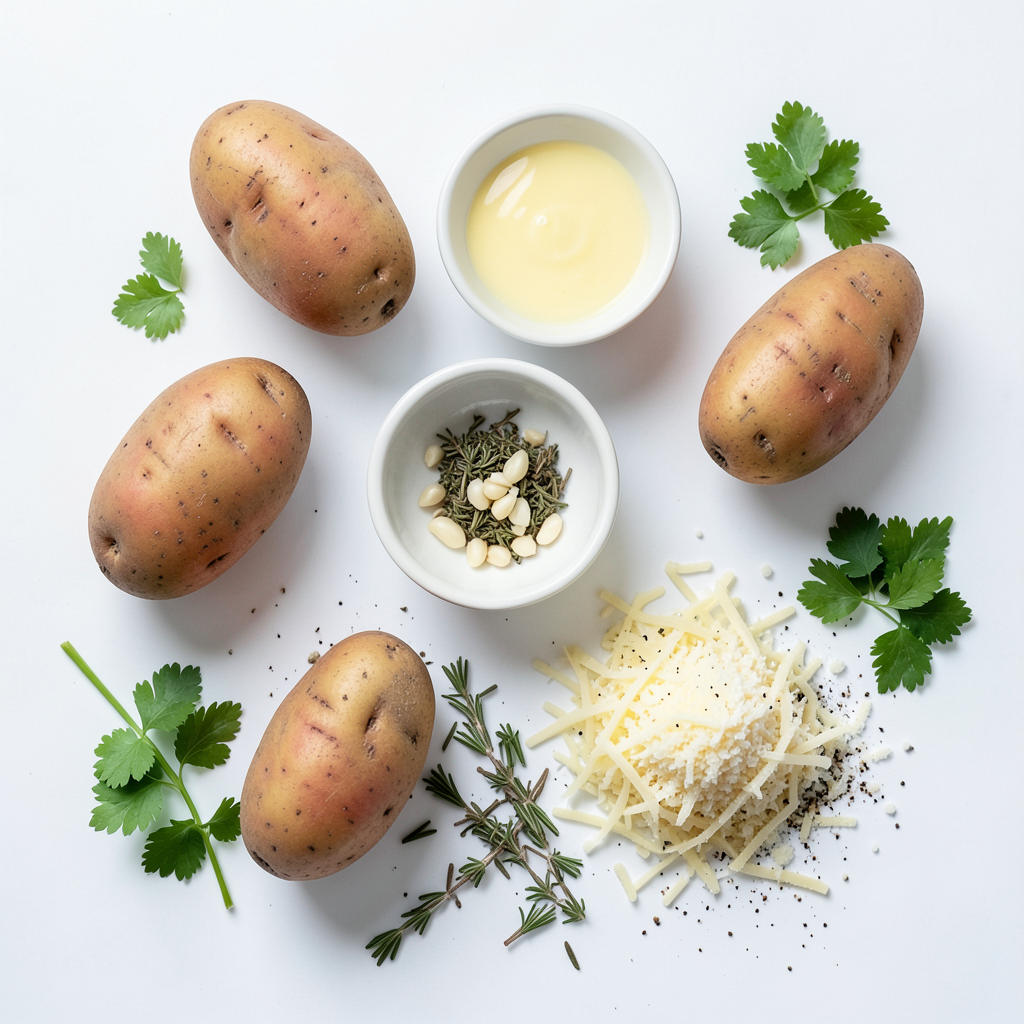
To make Cheesy Garlic Butter Potato Stacks, gather the following items:
- 4 medium-sized Russet potatoes
- 1/2 cup unsalted butter, melted
- 4 cloves garlic, minced
- 1 teaspoon dried thyme
- 1 teaspoon dried rosemary
- 1 cup shredded mozzarella cheese
- 1 cup grated Parmesan cheese
- Salt and pepper to taste
- Fresh parsley, chopped (for garnish)
It's crucial to use fresh ingredients for the best flavor. The Russet potatoes give a great texture. The garlic and herbs will add depth to the dish.
Suggested Tools and Equipment
For this recipe, you will need:
- A mandoline slicer or sharp knife for slicing potatoes
- A mixing bowl for the garlic butter mixture
- A muffin tin to shape the stacks
- Cooking spray or extra melted butter to grease the muffin tin
If you want better results, consider using a food processor. It can help with mixing the butter and garlic evenly. A pastry brush is handy too; it makes spreading the butter easier.
Step-by-Step Instructions
Preparation of Ingredients
First, wash the potatoes under cold water. Use a scrub brush to remove any dirt. Next, peel the potatoes with a vegetable peeler. Slice them thinly using a mandoline slicer or a sharp knife. Aim for about 1/8 inch thickness. This helps them cook evenly.
Now, let’s make the garlic butter mixture. In a mixing bowl, combine the melted butter and minced garlic. Add the dried thyme and rosemary. Season with salt and pepper to taste. Stir everything together until mixed well. This rich garlic butter will add great flavor to your stacks.
Assembling the Potato Stacks
Preheat your oven to 375°F (190°C). While it heats, grease a muffin tin with cooking spray or more melted butter. This step prevents the potato stacks from sticking.
Take each potato slice and dip it into the garlic butter mixture. Ensure each slice is well-coated. Start stacking the slices in the muffin tin. Layer up to 4-5 slices high for each stack. Once done, pour any leftover garlic butter over the tops. This adds more flavor.
Sprinkle shredded mozzarella cheese and grated Parmesan cheese generously on each stack. The cheese will melt and create a lovely crust when baked.
Baking Process
Place the muffin tin in the preheated oven. Bake for about 35-40 minutes. Keep an eye on the stacks as they bake. You want the potatoes to be tender and the cheese to be golden and bubbly.
To check doneness, insert a knife into the center of a stack. If it slides in easily, they are ready. Let the stacks cool for a few minutes before carefully removing them from the muffin tin. This helps them hold their shape.
Tips & Tricks
Achieving Perfect Potato Stacks
To get even cooking, make sure your potato slices are thin and uniform. I recommend using a mandoline slicer for this task. This tool helps you achieve that perfect 1/8 inch thickness. When all the slices are the same size, they cook evenly.
Next, to ensure the cheese melts perfectly, layer it properly. Start with a slice, add cheese, then stack more slices. Repeat this until you reach the top. This method helps the heat reach all the cheese, making it gooey and delicious.
Enhancing Flavor
To take your potato stacks to the next level, consider adding herbs and spices. Fresh chives or dill can add a nice touch. If you like a bit of heat, sprinkle in some red pepper flakes. These small changes can really enhance the flavor.
For dipping sauces, I suggest a creamy ranch or a spicy aioli. These sauces complement the cheesy and garlicky flavors well. They also add a fun twist to your dish. Enjoy experimenting with different flavors!
Pro Tips
- Uniform Slices: Ensure all potato slices are of equal thickness for even cooking and consistent texture.
- Flavor Infusion: Let the garlic butter mixture sit for a few minutes before using to allow the flavors to meld together.
- Cheese Variations: Experiment with different cheeses like cheddar or gouda for a unique flavor profile.
- Rest Before Serving: Allow the stacks to cool slightly before removing them from the muffin tin to prevent them from breaking apart.
Variations
Different Cheese Options
You can switch up the cheeses in this dish. Instead of mozzarella and Parmesan, try cheddar or gouda. Cheddar adds a sharp flavor, while gouda brings a creamy touch. You can also use feta for a tangy kick. Each cheese changes the taste and texture of the stacks. Mixing cheeses can create a unique flavor blend.
Healthier Alternatives
For a lighter version, substitute the butter with olive oil. You can also use low-fat cheese options. This keeps the flavor while cutting calories. Adding veggies like spinach or bell peppers boosts nutrition. You can mix in cooked chicken or beans for extra protein. These swaps make the dish healthier without losing taste.
Storage Info
How to Store Leftovers
To keep your cheesy garlic butter potato stacks fresh, store them in an airtight container. This helps prevent moisture loss and keeps flavors intact. Place the cooled stacks in the fridge. They can stay fresh for about 3 to 4 days. If you want to save them for longer, consider freezing. To freeze, wrap each stack tightly in plastic wrap, then place them in a freezer bag. They can last for up to 2 months this way. Just remember to label the bags with the date!
Reheating Instructions
When it's time to enjoy your leftovers, you can reheat them easily. For the best results, use the oven. Preheat it to 350°F (175°C) and place the stacks on a baking sheet. Heat for about 15 to 20 minutes or until they are warmed through. You can cover them with foil to keep them from drying out.
If you're short on time, the microwave works too. Just place a stack on a microwave-safe plate and cover it with a damp paper towel. Heat for about 1 to 2 minutes. Check if they're hot enough, and add time if needed. While the microwave is quicker, the oven gives you that crispy texture back.
FAQs
Common Questions about Cheesy Garlic Butter Potato Stacks
Can I make these stacks ahead of time? Yes, you can prepare these stacks in advance. Slice the potatoes and mix the garlic butter. Then, store them in the fridge. Assemble the stacks when you are ready to bake. This way, you save time on busy days.
What can I serve with cheesy garlic butter potato stacks? These potato stacks pair well with many dishes. Try serving them with grilled chicken, steak, or roasted vegetables. They also make a great side for salads. The rich flavors of the stacks complement many meals.
Are there gluten-free options for this recipe? Yes, this recipe is naturally gluten-free. All the ingredients, like potatoes and cheese, do not contain gluten. Just ensure any additional ingredients, like spices, are gluten-free. This makes it a safe choice for those with gluten sensitivities.
In this article, we explored how to make cheesy garlic butter potato stacks. We discussed the ingredients and tools needed for success. I shared step-by-step instructions, tips for perfect results, and creative variations. We also covered storage and reheating methods to keep your stacks fresh.
With this guide, you can create a dish that impresses everyone. Try different cheeses or add veggies to customize your stacks. Enjoy your cooking adventure and make each bite flavorful!