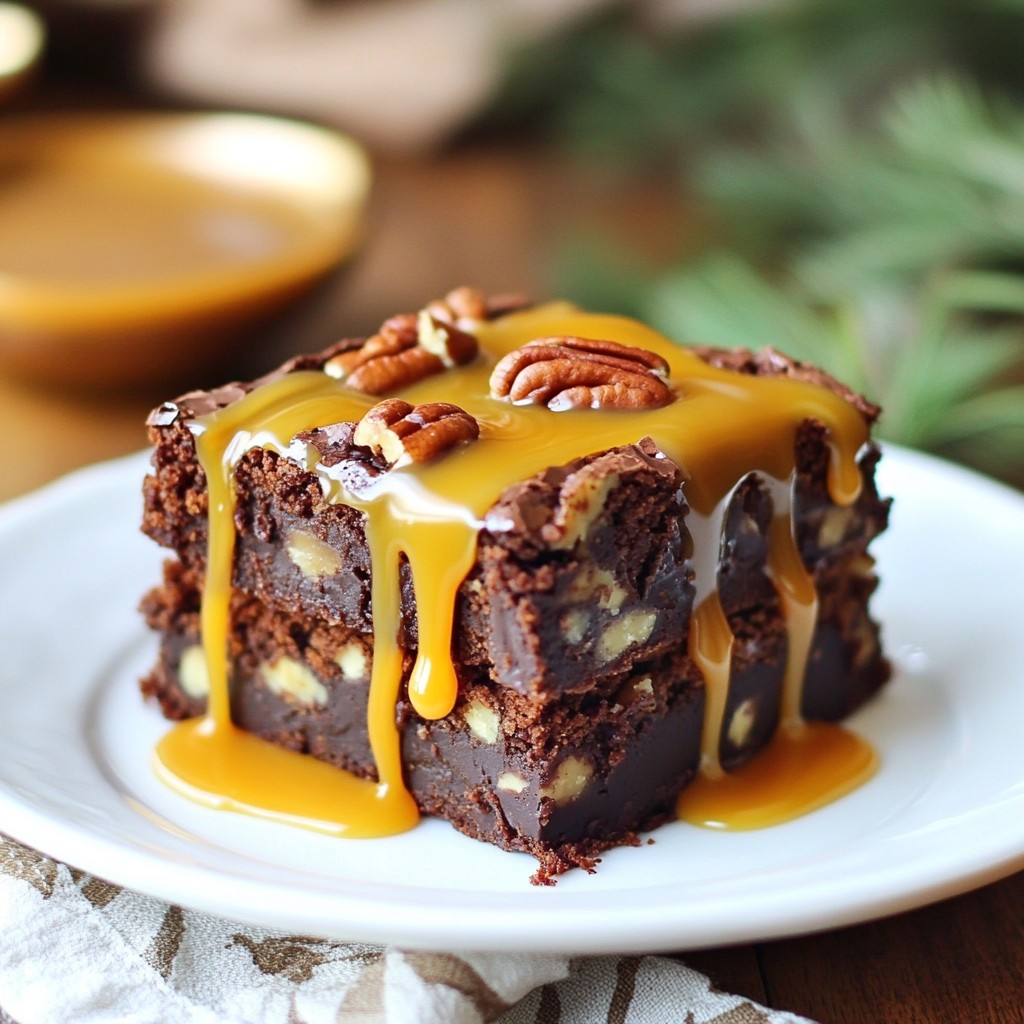
Indulge in the ultimate sweet treat with my Chocolate Caramel Turtle Brownies! These luscious brownies combine rich chocolate, gooey caramel, and crunchy pecans for a taste you'll crave. I'll guide you through a simple recipe that packs a delightful crunch and a burst of flavor in each bite. Whether you're baking for a gathering or a cozy night in, these brownies will shine on every dessert table. Ready to dive in? Let's get started!
Why I Love This Recipe
- Decadent Flavor Profile: The combination of rich chocolate, creamy caramel, and crunchy pecans creates a delightful taste experience that is simply irresistible.
- Easy to Make: This recipe requires straightforward steps and common ingredients, making it accessible for bakers of all skill levels.
- Perfect for Any Occasion: Whether it's a family gathering, a holiday feast, or just a sweet treat for yourself, these brownies fit any event perfectly.
- Impressive Presentation: With its marbled layers and the option to add extra caramel and pecans on top, these brownies are sure to impress your guests.
Ingredients
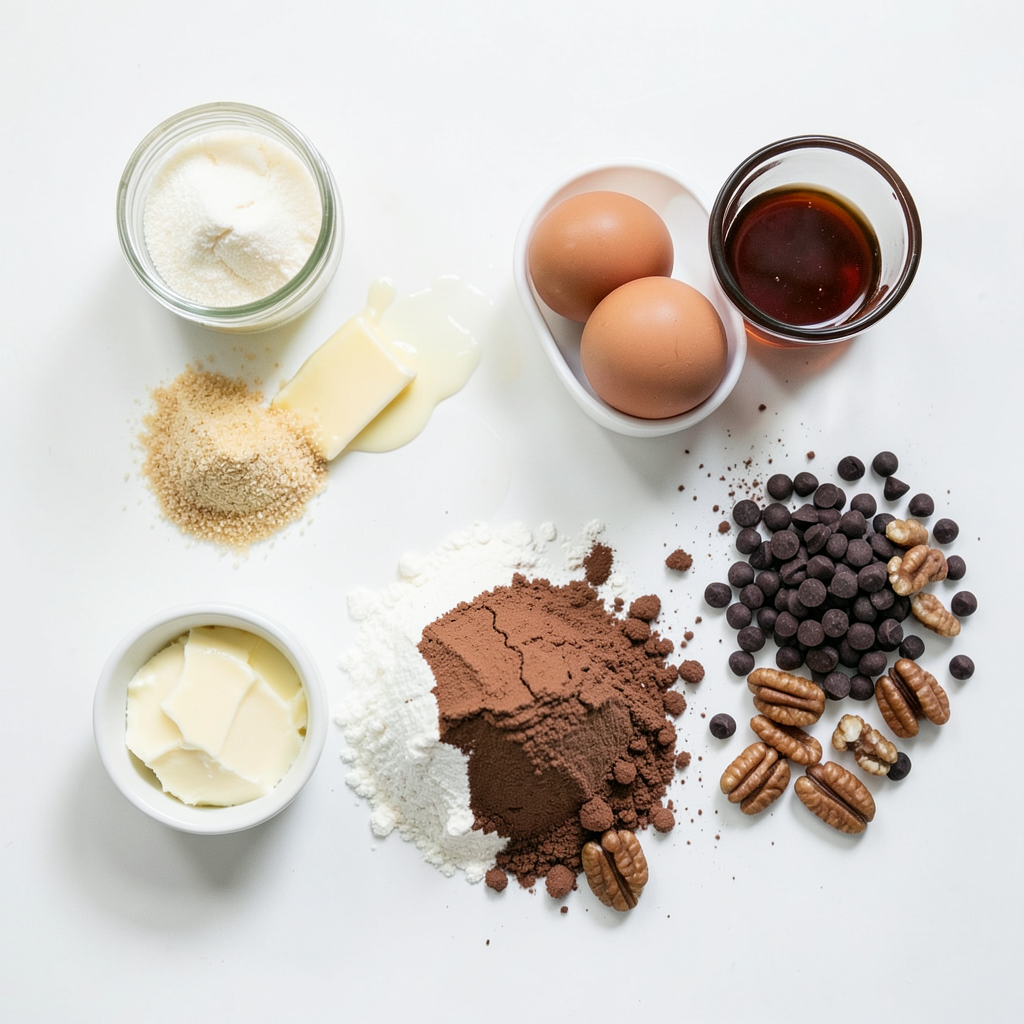
Detailed ingredients list
- 1 cup unsalted butter, melted
- 2 cups granulated sugar
- 4 large eggs
- 1 teaspoon vanilla extract
- 1 cup all-purpose flour
- 1/2 cup cocoa powder
- 1/4 teaspoon salt
- 1 cup semisweet chocolate chips
- 1 cup caramel sauce (store-bought or homemade)
- 1 cup pecans, roughly chopped
To create Chocolate Caramel Turtle Brownies, you need a few key ingredients. First, you start with unsalted butter, which gives your brownies a rich base. Next, granulated sugar adds sweetness and helps with that nice, chewy texture. Four large eggs bind everything together and provide moisture.
You will also need vanilla extract for flavor, and all-purpose flour to give structure. The cocoa powder adds the chocolate flavor we crave. Don’t forget salt; it enhances all the flavors. For that gooey chocolate goodness, use semisweet chocolate chips.
Finally, the caramel sauce and chopped pecans make these brownies special. You can use store-bought caramel or make your own. Pecans add a nice crunch and complement the sweet caramel.
Optional substitution suggestions
- Butter alternatives: Try coconut oil or vegan butter for a dairy-free option.
- Sugar substitutes: Use coconut sugar or a sugar-free sweetener if you prefer.
- Egg alternatives: Applesauce or flaxseed meal can replace eggs for a vegan option.
These substitutions help you customize your brownies to fit your diet while still keeping them delicious. Enjoy making your unique version!
Step-by-Step Instructions
Preparation of the baking pan
First, preheat your oven to 350°F (175°C). This step warms the oven for even baking. Next, take a 9x13 inch baking pan and grease it well. Line the bottom and sides with parchment paper. Leave some paper hanging over the edges. This makes it easy to lift the brownies out later.
Mixing the wet ingredients
In a large mixing bowl, pour in the melted butter. Add the granulated sugar and whisk them together well. It should look smooth and creamy. Next, crack in the eggs one at a time. Mix each egg in fully before adding the next. Finally, stir in the vanilla extract for a nice flavor boost.
Incorporating dry ingredients
Grab a separate bowl to sift the all-purpose flour, cocoa powder, and salt. Sifting helps keep the dry mix light and airy. Slowly fold this dry mix into the wet ingredients. Be careful not to overmix; we want it just combined for perfect brownies.
Layering the brownie batter and caramel
Now, pour half of the brownie batter into your prepared pan. Use a spatula to spread it evenly. Next, take your caramel sauce and spoon it over the batter. Spread it out, but leave some space at the edges. Now, dollop the rest of the brownie batter on top. To create a marbled effect, gently swirl the batter into the caramel with a knife or spatula.
Baking process
Place the pan in your preheated oven. Bake for 30 to 35 minutes. To check for doneness, insert a toothpick in the center. It should come out with a few moist crumbs, but not wet batter. Once done, take the brownies out of the oven. Let them cool in the pan on a wire rack before lifting them out and slicing into squares.
Tips & Tricks
How to achieve the perfect brownie texture
To get the best brownie texture, avoid overmixing the batter. Overmixing can make brownies tough. Mix just until the dry and wet ingredients come together.
To test for doneness, use a toothpick. Insert it into the center of the brownies. If it comes out with a few moist crumbs, they are ready. If it comes out wet, bake for a few more minutes.
Enhancements for flavor and presentation
For a special touch, serve these brownies with a scoop of vanilla ice cream. The cold ice cream pairs perfectly with the warm brownies.
You can also add more toppings for extra flavor. Try drizzling more caramel sauce on top. A few pecan halves can add a nice crunch and look great.
Common mistakes to avoid
One common mistake is not measuring ingredients correctly. Use a kitchen scale or measuring cups for accuracy. This ensures the right texture and taste.
Another issue can be baking time. Check your brownies a few minutes before the suggested time. Ovens can vary, so keep an eye on them to avoid overbaking.
Pro Tips
- Use Room Temperature Ingredients: Make sure your eggs are at room temperature for better incorporation into the batter, resulting in a smoother texture.
- Don’t Overmix: Once you combine the wet and dry ingredients, mix just until combined to keep your brownies fudgy and soft.
- Chill Before Cutting: For cleaner cuts, allow your brownies to cool completely in the pan before slicing. You can even refrigerate them for a short time.
Variations
Different nuts to use
You can change the nuts in your brownies. Instead of pecans, try walnuts, almonds, or hazelnuts. Each nut brings its own flavor and crunch. Walnuts add a rich, earthy taste. Almonds give a sweet, light crunch. Hazelnuts have a nice, buttery flavor that pairs well with chocolate. Feel free to mix and match to find your favorite!
Flavor variations
Adding different flavors can make these brownies extra special. You can mix in peppermint extract for a minty twist. Just half a teaspoon will do the trick. Another option is to add espresso powder. This small amount enhances the chocolate flavor. Both options create a unique taste that keeps you coming back for more!
Gluten-free adaptations
Want to make gluten-free brownies? It's simple! You can swap out regular flour for gluten-free flour. Look for blends that work well in baking. Almond flour or coconut flour are also great choices. Just keep in mind that these flours will change the texture a bit. Test different flours until you find one you love!
Storage Info
Best practices for storing brownies
Store your brownies in an airtight container. You can keep them at room temperature for up to three days. If your kitchen is warm, the fridge may be better. Just remember, cold air can dry them out.
Freezing brownies
To freeze brownies, cut them into squares first. Wrap each square in plastic wrap, then place them in a freezer bag. This way, they won’t stick together. When you're ready to eat, let them thaw at room temperature for about an hour.
Shelf life
Brownies last about one week at room temperature. In the fridge, they can last up to two weeks. When frozen, they can stay fresh for about three months. Just make sure to check for any signs of freezer burn before eating.
FAQs
Can I use homemade caramel sauce?
Yes, you can use homemade caramel sauce. Making caramel at home can be fun and rewarding. Here are some tips:
- Use a heavy saucepan. This helps distribute heat evenly.
- Start with sugar. Pour sugar into the pan and heat it on medium.
- Watch closely. Stir occasionally until the sugar melts.
- Add butter and cream. Once melted, add butter and then cream to create a smooth sauce.
- Cool before using. Let the caramel cool slightly before adding it to your brownies.
How do I know when brownies are done?
You can tell brownies are done by checking a few signs:
- Toothpick test. Insert a toothpick in the center. If it comes out with a few moist crumbs, they are ready.
- Look for slight cracks. The top should have a shiny finish with slight cracks.
- Firm edges. The edges should look set while the center remains soft.
Can these brownies be made in advance?
Yes, you can make these brownies ahead of time. Here’s how:
- Bake and cool. Follow the recipe and allow the brownies to cool completely.
- Store properly. Wrap them in plastic wrap or place them in an airtight container.
- Best serving method. When ready to serve, cut them into squares and warm them slightly in the oven. This enhances their flavor and gooeyness.
To summarize, this blog post guides you through making delicious brownies. It covers essential ingredients, step-by-step instructions, and helpful tips for perfect texture. I also shared tasty variations and storage advice to keep your brownies fresh.
Remember, brownies can be fun and flexible. Experiment with substitutes and toppings. Enjoy baking your tasty treats and sharing them with friends. Happy baking!